
One Door in a Matched Set
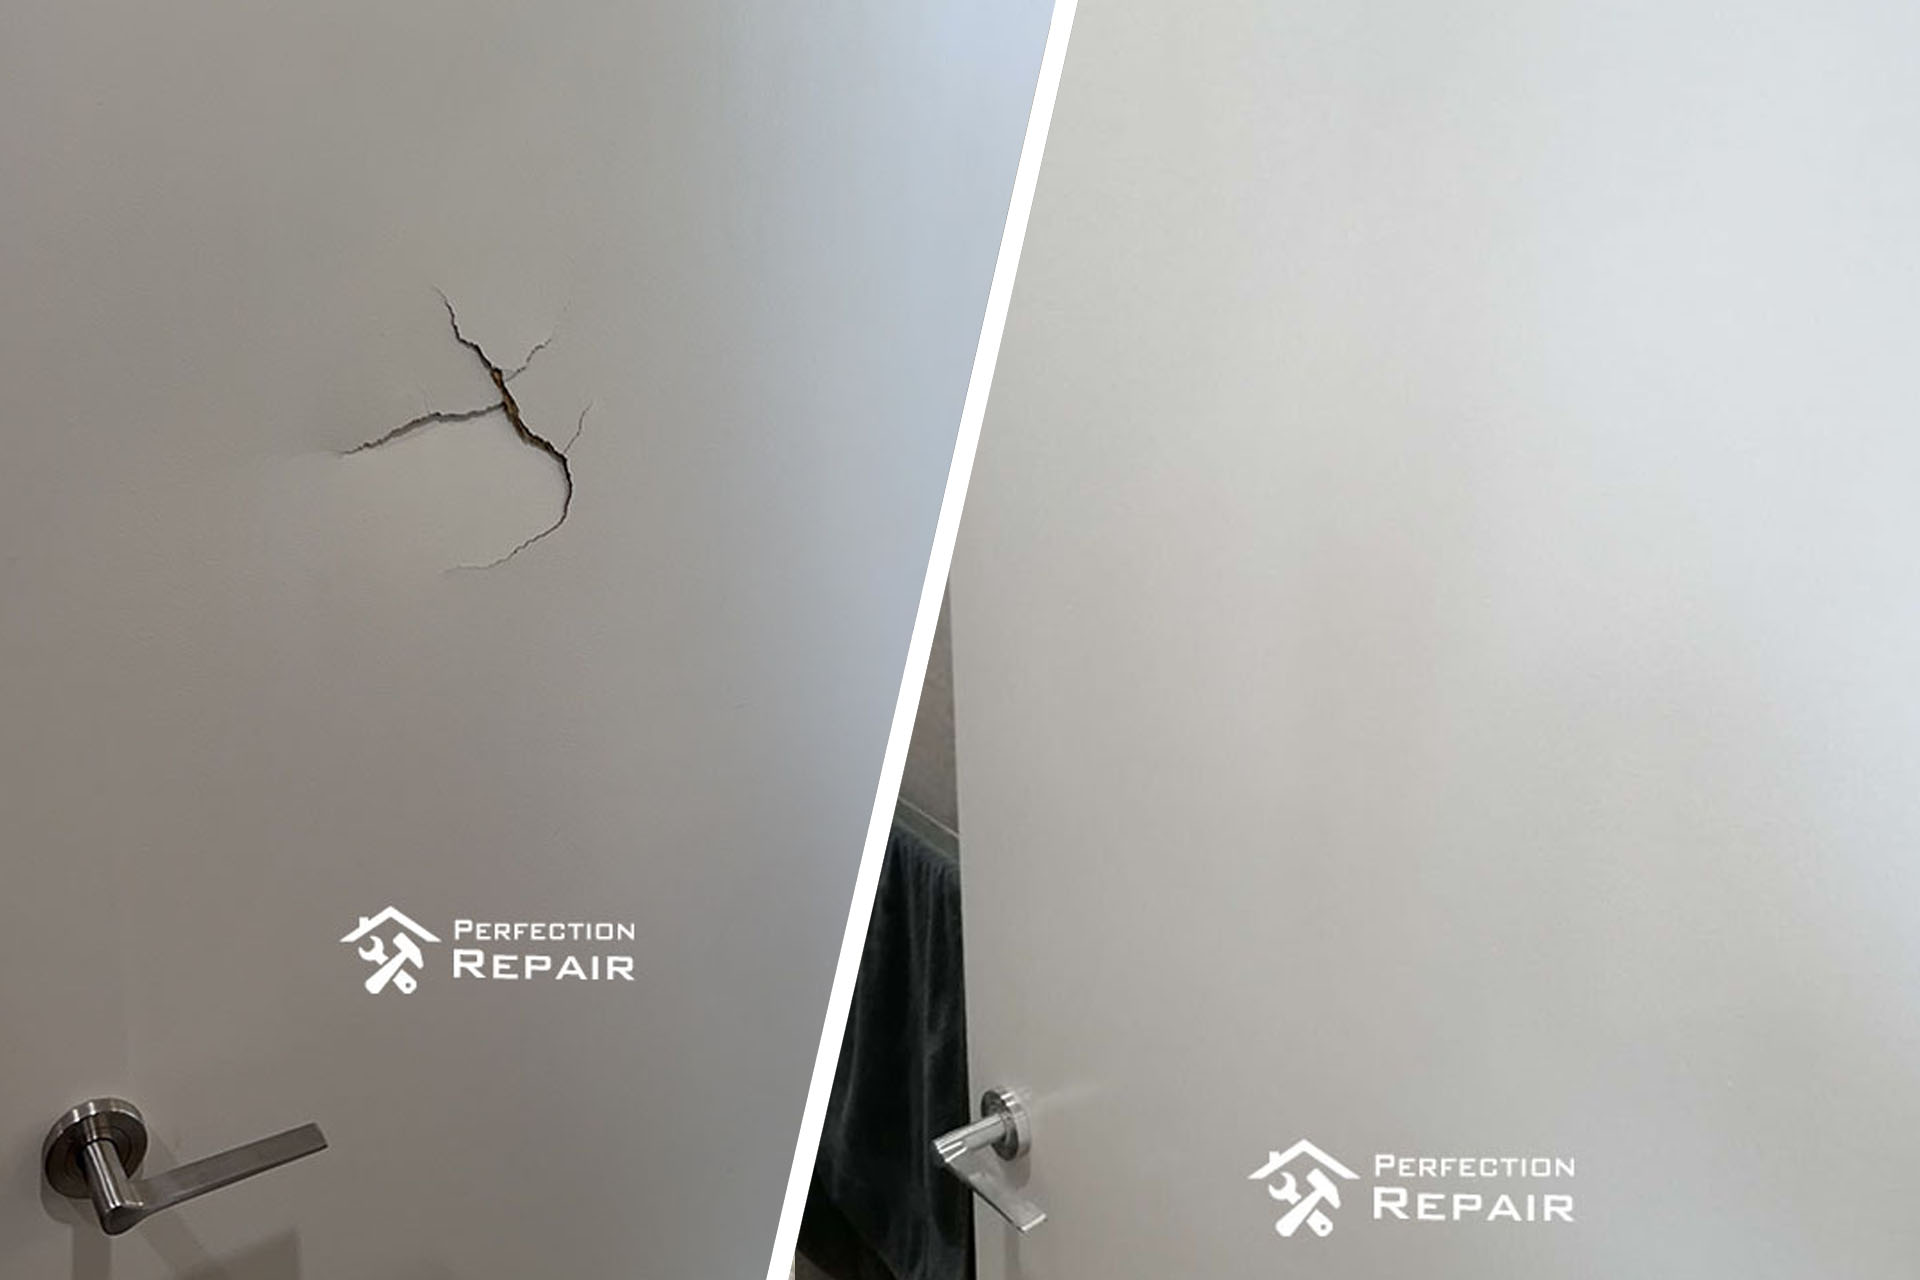
The hallway at this Chatswood property had four internal doors — same profile, same paint, all installed at the same time. One of them had taken an impact, leaving a clean puncture through the face panel.
The structural problem was minor. The practical problem was harder: replace one door in a matched set and you either accept a visible mismatch or repaint all four to bring them back into line. Either way, the scope and cost expands well beyond the original damage.
The client wanted to know if the hole could be repaired without any of that.
Why the Repair Scope Stayed Small
The damage was limited to the face panel. The door core, frame, and hardware were all intact — the door closed, latched, and functioned normally. That assessment is what keeps the job localised.
The repair process has three stages, and each one has to be done correctly for the next to work. The structural fill needs to sit dimensionally flush with the surrounding surface and have enough flexibility to move with the panel — a rigid fill in a hollow-core door will crack at the edges over time. The sanding has to bring the patch to a true level with no visible boundary, because paint will follow every contour. And the paint itself has to be mixed to the current aged tone of the door, not the original specification — a fresh match to a colour chip from years ago will read as a bright patch on a surface that has mellowed.
We mixed the finish on-site, checked the sheen level against the adjacent doors, and applied by spray to replicate the existing texture. The repaired door was assessed alongside the other three in the set before we finished.
The Result
The client walked the hallway and identified the wrong door when asked to point to the repair.
The job took 2.5 hours. No doors were removed, no repainting of the set was required, and the hallway was back in use the same afternoon. For damage that is genuinely confined to the surface, that is what a correct localised repair produces.
If you have a damaged internal door in Sydney and are unsure whether repair or replacement is the right call, the answer depends on where the damage stops. We assess before quoting and will tell you which approach makes sense for the specific job.
Workflow

Structural Assessment and Patching
The impact had punched through the door face but left the frame and core intact. We filled the hole using a high-density bonding compound matched to the door substrate — the goal at this stage is dimensional accuracy, not appearance. The patch needs to sit flush with the surrounding surface and flex at the same rate as the rest of the panel, or the finish will crack at the repair line over time.

Levelling and Surface Preparation
Once the fill had cured, we sanded the patch back in stages using progressively finer grits until the transition between the repair and the original surface was undetectable by touch. This step determines whether the finished paint coat looks flat or shows a faint outline of the repair — the most common failure point in DIY door patching.

On-Site Colour Match and Finishing
The door was part of a matching set throughout the hallway — all painted the same colour at the same time, now several years old. We mixed the paint on-site to account for the current aged tone rather than the original specification, then applied a spray finish to replicate the existing sheen level and texture. The repaired door was checked alongside its neighbours before we signed off.