

When a Bathroom Leak Spreads Beyond the Bathroom
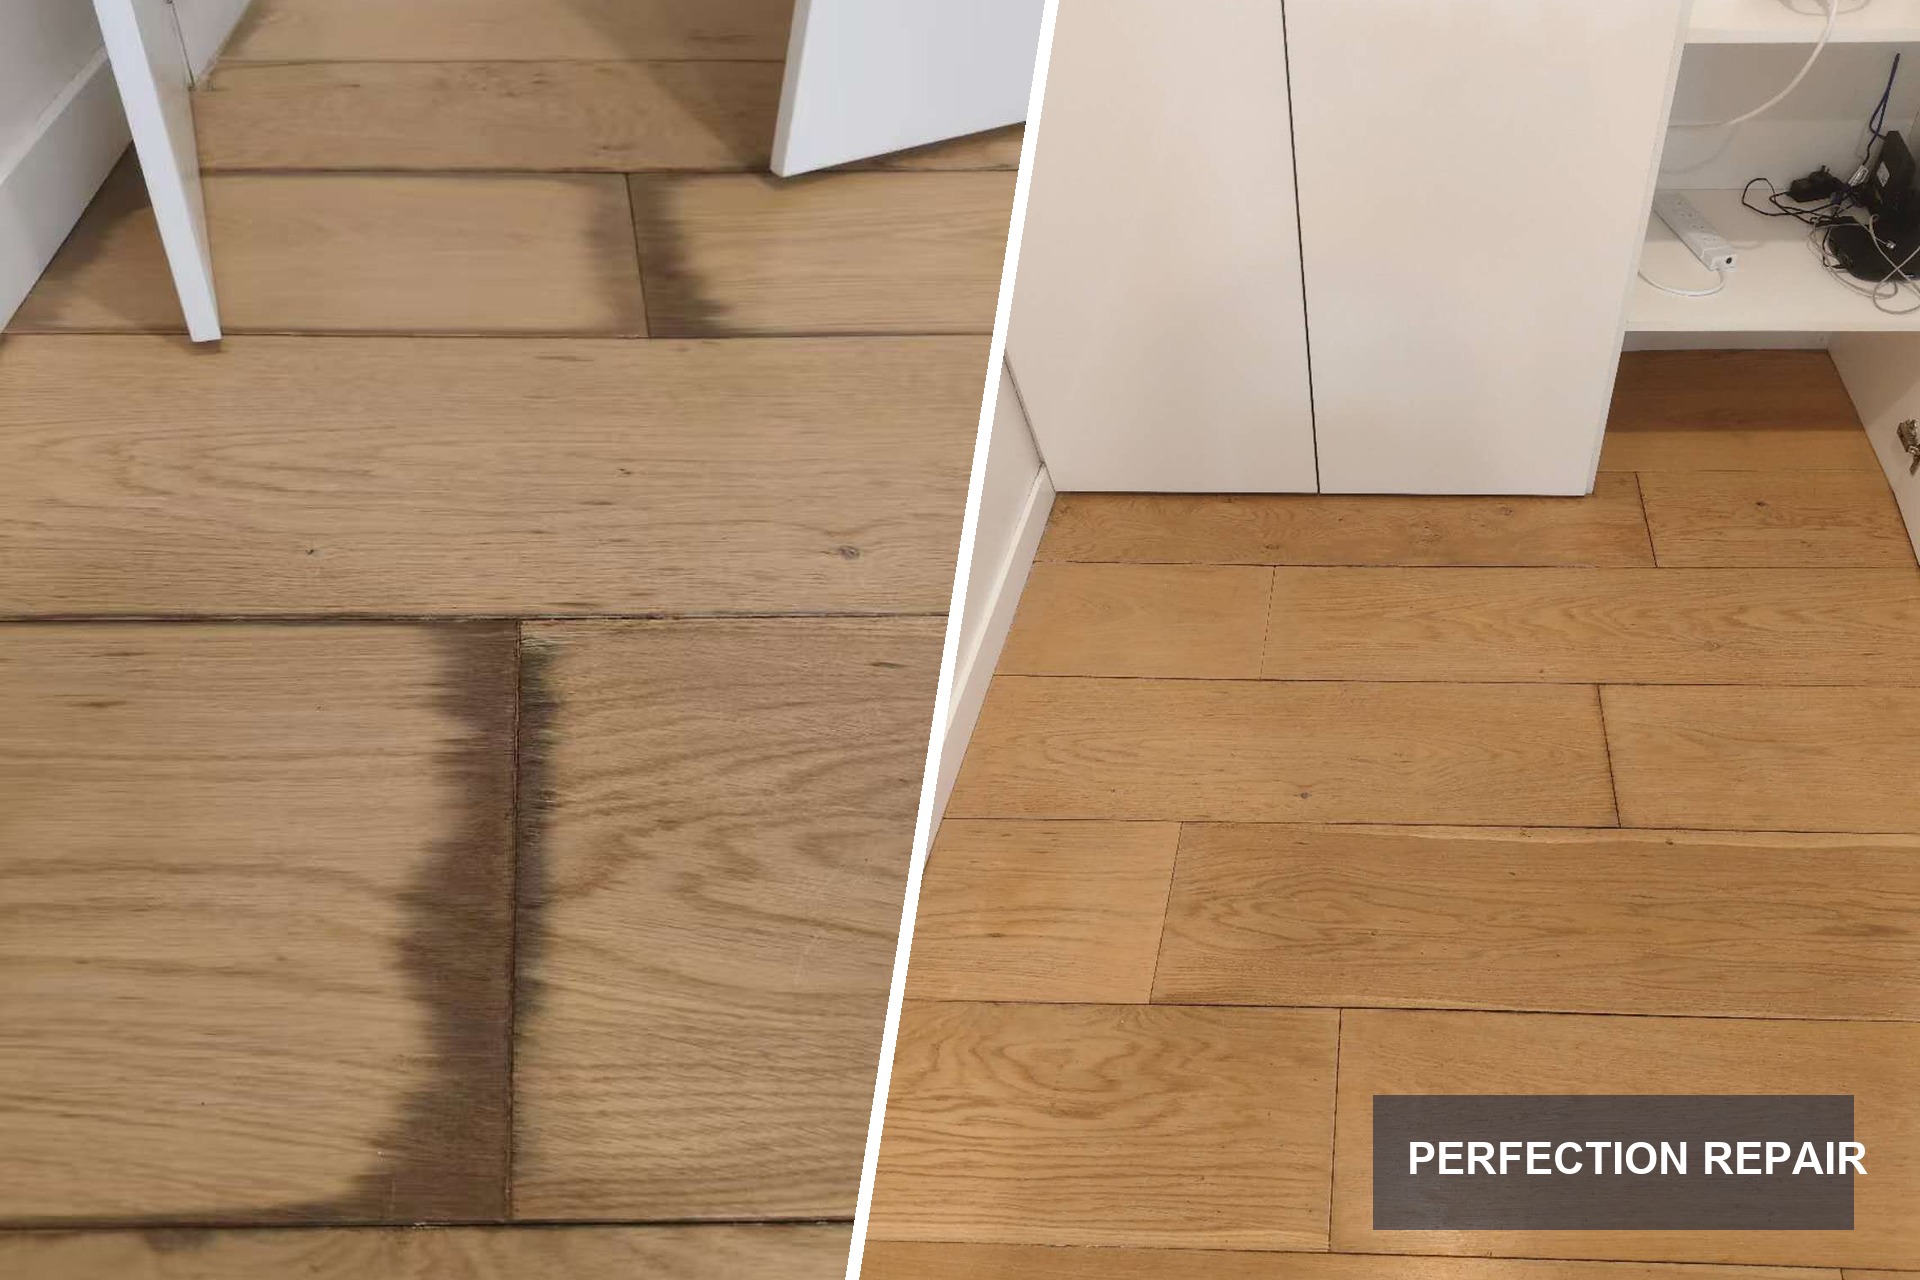
Water damage rarely stays where it starts. In this Macquarie University apartment, a bathroom leak had allowed moisture to travel into the adjoining timber floor. By the time the problem was inspected, the floor showed darkened joins, damp-looking patches and small areas of mould growth. The damage was most noticeable near the doorway, along the cabinet line and across several boards leading into the room.
The homeowner’s first concern was whether the entire floor would need to be removed. That is a common reaction to water damaged timber, particularly when the floor has started to look darker and the board gaps have become more visible. However, full replacement is not always the best or most practical answer. The right approach depends on how far the moisture has penetrated, whether the boards have lost their structure and whether the visible damage can be isolated.
After checking the affected area, we found that the floor could be treated as a localised restoration. The leak source had already been addressed, and the boards remained stable enough to clean, prepare and refinish. That meant the client could keep the existing floor and avoid unnecessary demolition, matching problems and disruption to the rest of the apartment.
Assessing Moisture Damage Before Repairing the Floor
The first step in any floor repair after a leak is diagnosis. Simply sanding over a dark mark can trap contamination in the surface or hide a moisture problem that is still active. We examined the board joins, edges and areas close to the bathroom transition, looking for signs of swelling, movement, loose coating and mould.
The affected timber had a warm, natural oak appearance, so the repair also needed to respect the existing grain and colour variation. Timber does not have one uniform colour across every board. Small changes in tone, knots and grain direction are part of the floor’s character, which is why a generic stain or a large patch of new coating can look more obvious than the original damage.
We marked out the repair zone and protected the surrounding surfaces before starting. This kept the work focused on the boards that needed attention and reduced the risk of spreading dirt or cleaning products into unaffected areas.
Removing Mould and Preparing the Affected Timber
Moisture damage needs more than a cosmetic cover-up. We removed surface contamination and mould spotting using a controlled cleaning process suitable for the existing finish. The darkened joints were carefully cleaned and prepared, while the surrounding timber was left intact wherever it remained sound.
The preparation stage is where much of the final result is decided. If the surface is not clean, dry and stable, colour blending and finishing products will not bond consistently. We therefore worked gradually, checking the board edges and transitions as the marks were reduced. This avoided aggressive treatment that could widen the repair area or create a new mismatch.
The same attention to surface continuity is central to our floor repair service. The aim is to isolate the damaged section, work with the existing boards and blend the repair into the surrounding floor rather than creating a conspicuous new patch. For this timber floor, that meant preserving as much of the original board and finish as possible.
Matching the Existing Timber Colour and Finish
Once the affected area had been cleaned and prepared, we focused on the visual repair. Water can leave timber with a grey, brown or uneven appearance, especially around joins where moisture sits for longer. The colour was rebuilt in controlled stages so the repaired boards would sit naturally beside the surrounding floor.
We also refined the board joins and matched the existing sheen. A repair can be technically sound but still stand out if the finish is too glossy, too flat or noticeably different from the rest of the room. The aim was not to make the affected boards look brand new in isolation. It was to make them look like part of the same floor, with the existing grain, knots and natural variation still visible.
The work took five hours on site. During the final inspection, we viewed the floor from standing height, from the doorway and from close range around the cabinetry. The repaired section blended into the surrounding boards without a hard colour edge or an obvious rectangular patch.
A Practical Alternative to Replacing the Whole Floor
For this Macquarie University property, localised timber floor water damage repair was the sensible option. The client avoided the cost and disruption of removing a larger area of flooring, while the original boards and overall character of the room were retained.
That does not mean every water damaged floor can be repaired in the same way. If boards are badly swollen, structurally weakened or affected by continuing moisture, replacement may be necessary. An honest assessment should come before any decision about sanding, coating or demolition.
In this case, the bathroom leak had created a visible but contained problem. After the source was dealt with, careful cleaning, mould removal, preparation and finish blending restored the floor in a single visit. The result was a cleaner, more consistent timber surface without turning a localised repair into a full renovation.
If a leak, appliance failure or bathroom overflow has left your Sydney floor stained, damp or mouldy, send us a few photos and the location of the damage. We can assess whether a targeted floor restoration is suitable and explain the repair options before work begins.
Workflow
Moisture and Surface Assessment
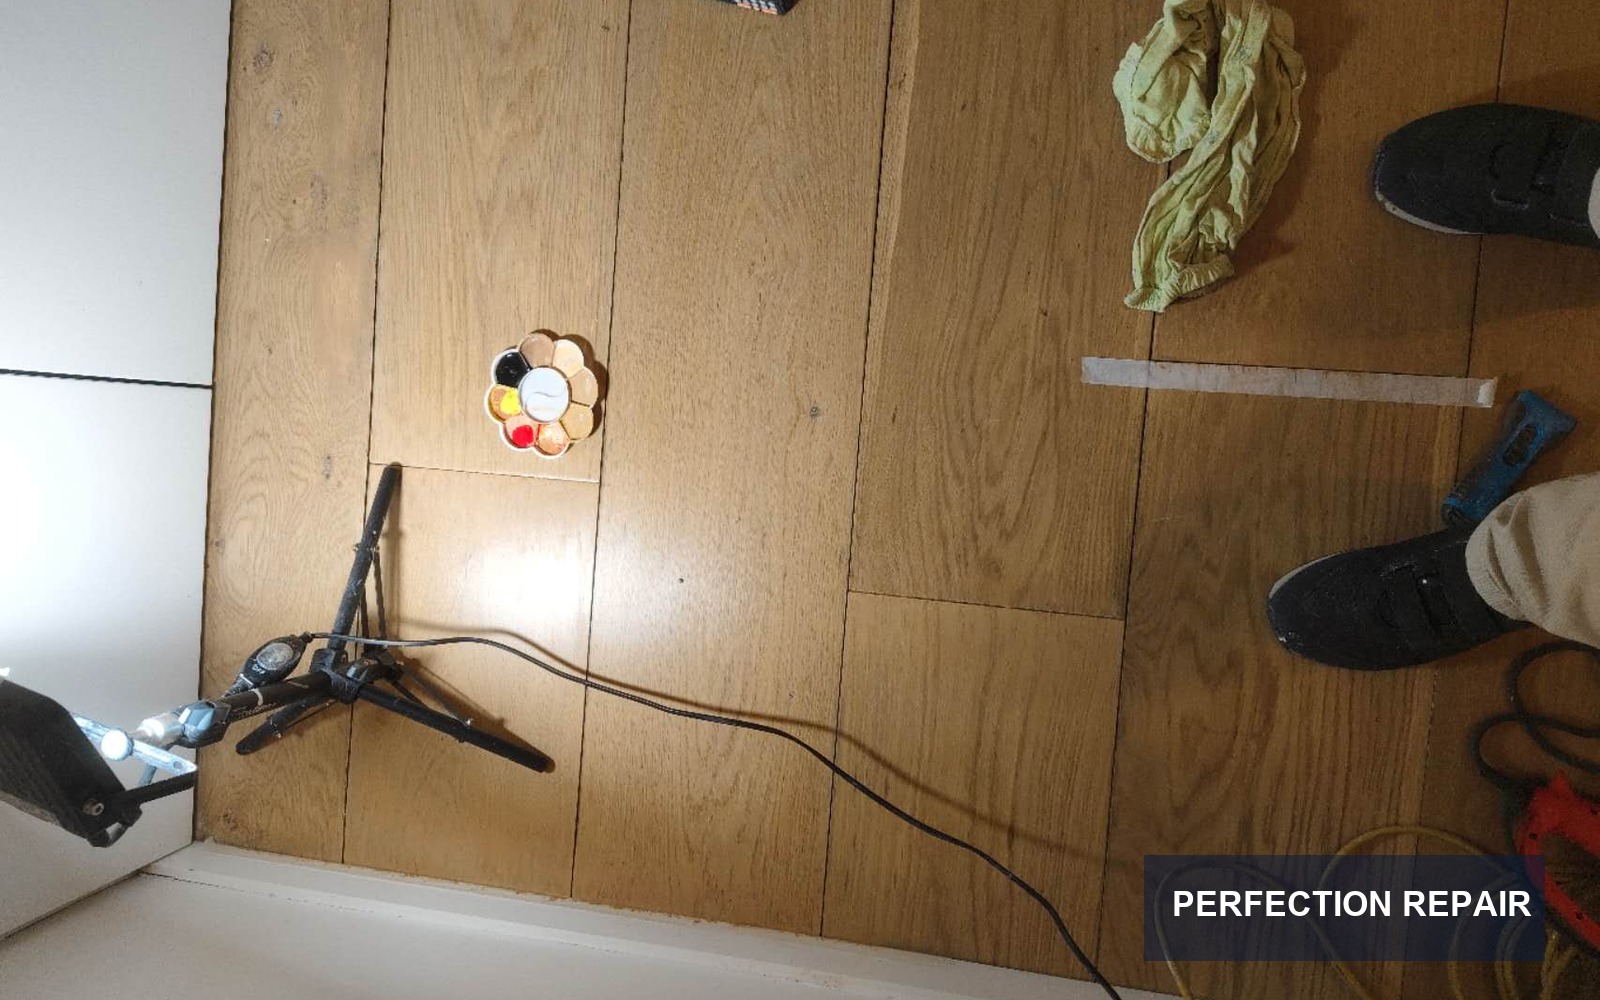
We first traced the visible staining back to the bathroom leak and checked the affected boards, joins and edges around the cabinetry. The floor had been exposed to moisture long enough to develop darkened joints and early mould growth, but the boards were still suitable for localised restoration rather than wholesale replacement.
Cleaning and Controlled Preparation
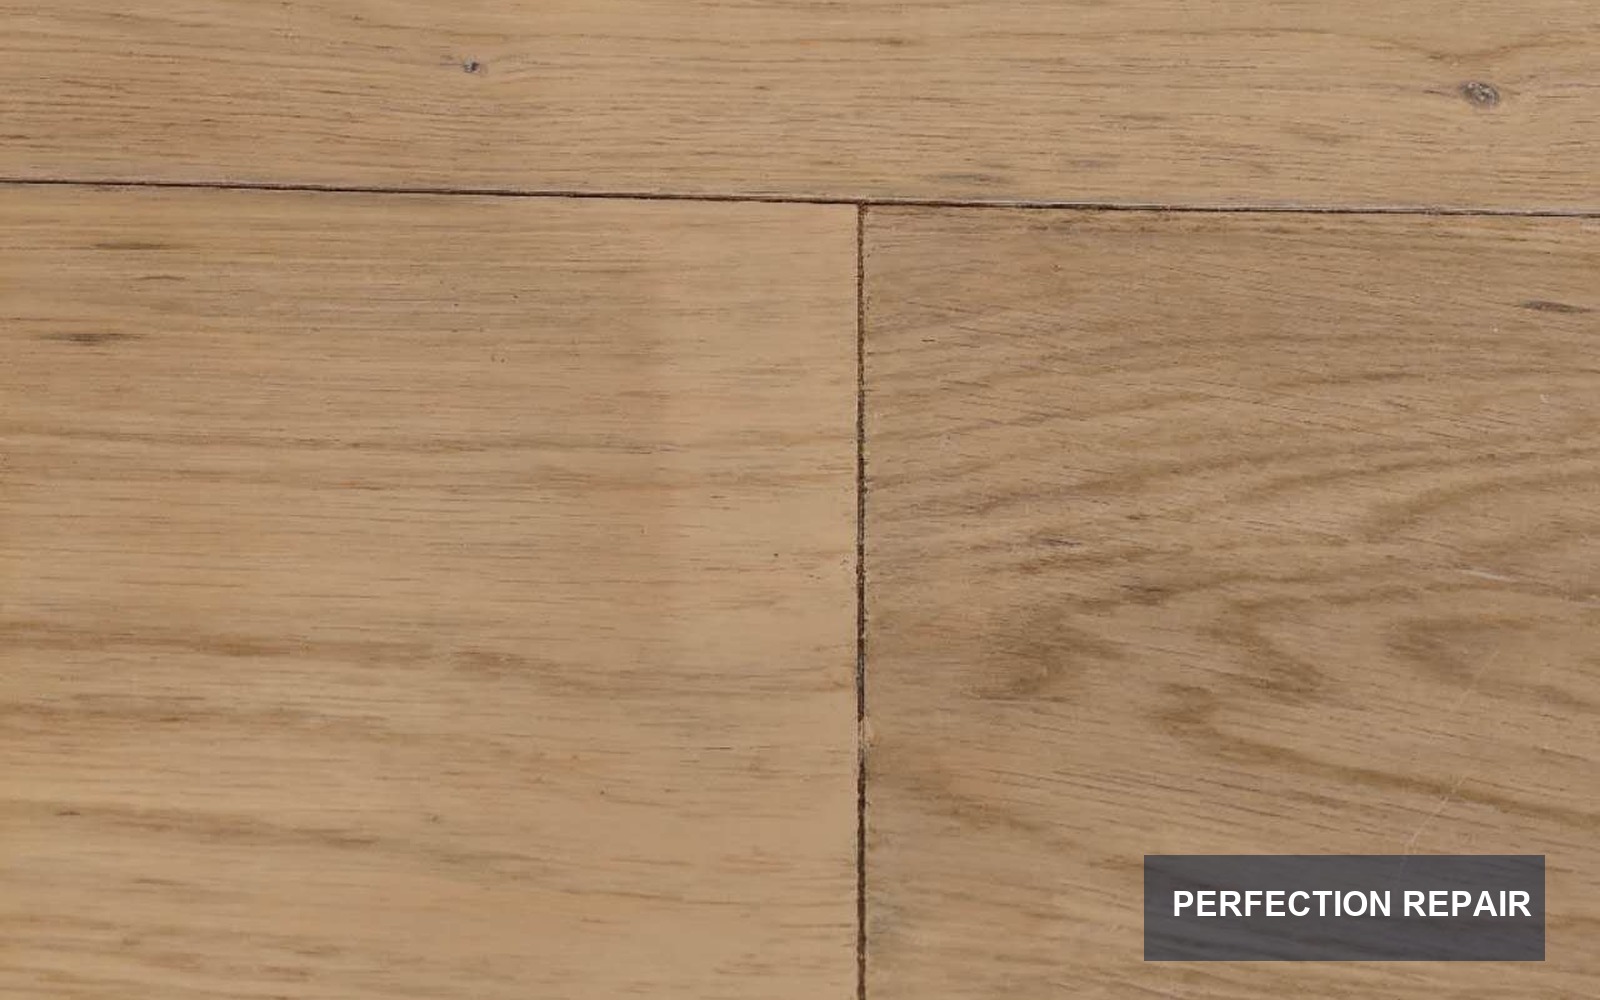
Loose contamination and surface mould were carefully removed, followed by cleaning and preparation of the affected timber. We worked within the damaged area and protected the surrounding boards, walls and cabinetry so the repair remained controlled and the existing floor finish was not unnecessarily disturbed.
Colour, Grain and Finish Blending
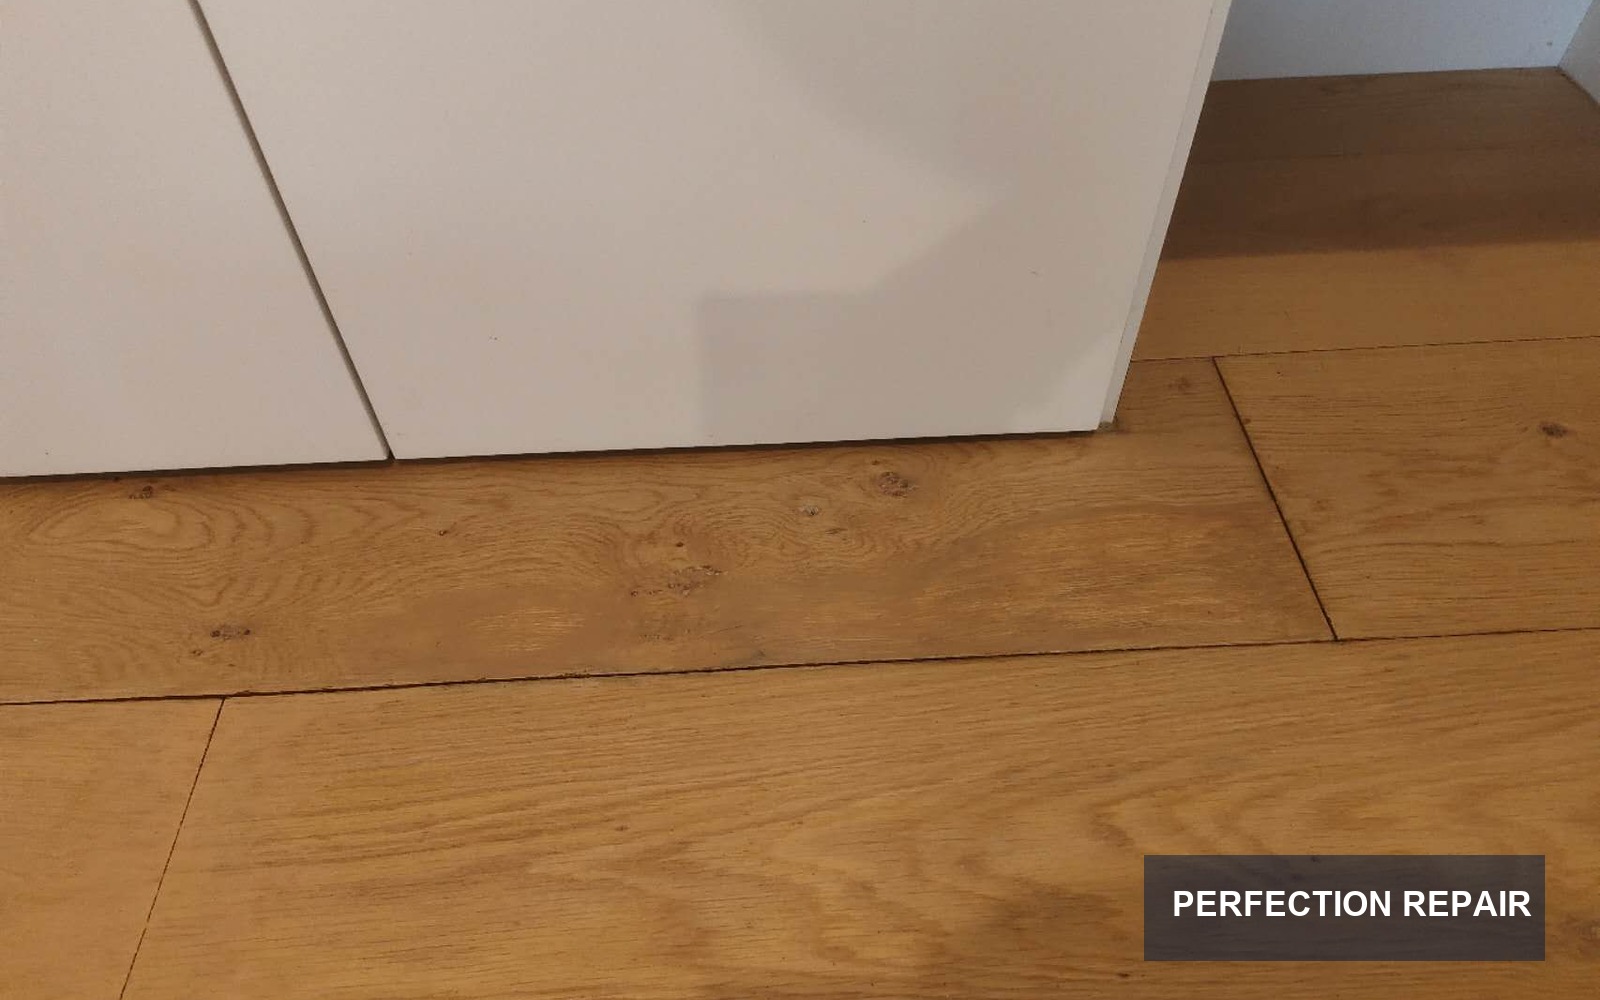
The final stage was to rebuild the visual consistency of the floor. We blended the dark moisture marks, refined the board joins and matched the surrounding timber colour and sheen. The repaired area was checked from several angles and under normal room lighting before the job was completed.