
Most homeowners who contact us about a scratched timber floor have already tried a hardware store wax stick or filler pen. The result is usually a flat, shiny patch that looks worse than the original scratch under certain lighting. Understanding why that happens — and what a professional repair does differently — helps set realistic expectations for what the process can achieve.
This post walks through the actual steps of a timber floor scratch repair, what materials are involved at each stage, and the factors that determine how invisible the final result will be.
Why DIY Products Usually Fall Short
The core problem with off-the-shelf wood fillers is that they are designed for speed and convenience, not visual accuracy. They come in a limited range of pre-mixed colours, they have a uniform sheen, and they have no grain texture. On a timber floor, where the colour varies across every board and the grain lines are the primary visual feature, a flat coloured patch stands out immediately — particularly under raking light from windows or downlights.
The other common issue is adhesion. Standard putty fillers do not bond well to finished timber surfaces. They dry hard and brittle, and because timber expands and contracts seasonally with humidity, the filler cracks and works loose within months. This is especially common in Sydney homes where the humidity difference between summer and winter is significant.
Step 1: Cleaning and Assessing the Damage
Before any filler goes into a scratch, the damaged area needs to be clean and the depth of the damage properly assessed. Surface polish, wax, and cleaning residue prevent filler from bonding. We clean the area with a solvent appropriate to the existing finish — polyurethane, hardwax oil, or lacquer each require a different approach.
Depth matters because it determines the repair method. A scratch that has only affected the finish layer is handled differently from one that has cut into the timber itself. A gouge that has removed timber below the surrounding surface level needs to be built up in layers rather than filled in one pass — thick layers of filler shrink as they cure and can sink below the surface level, which creates a visible dip.
We also assess the species and age of the timber at this stage. Older floors, particularly pre-finished engineered boards, may have a thinner wear layer than the boards suggest. This affects how aggressively we can work the surrounding surface to blend the repair.

Step 2: Filling and Levelling
For scratches that have cut into the timber, we use a two-part polyester or epoxy filler rather than standard wood putty. These materials cure hard without significant shrinkage, bond well to prepared timber surfaces, and are stable through seasonal humidity changes.
The filler is applied in thin layers, allowing each layer to cure before adding the next. This takes longer than a single fill but produces a more stable result. The final layer is built slightly proud of the surrounding surface and then sanded back flush once fully cured.
For shallow scratches that have only affected the finish, filling may not be necessary — the scratch can sometimes be addressed entirely in the finish stage.
Step 3: Base Colour Matching
Timber is not a single colour. Even within a single board, the colour shifts from the heartwood (darker, denser growth at the centre of the tree) to the sapwood (lighter, outer growth). Across a floor, different boards will have meaningfully different base tones depending on which part of the log they came from and how the floor has aged and been exposed to light over time.
Pre-mixed stains do not account for this variation. We mix pigments on-site using the actual boards surrounding the repair as the reference. The base tone — the dominant colour of the repair area — is matched first and applied as a ground layer.
Getting the base tone right is the most important step. Grain lines painted over a mismatched base colour will not read correctly regardless of how accurately they are drawn.
Step 4: Grain Replication
This is the stage that makes the difference between a repair that is invisible at normal viewing distance and one that remains visible as a flat-coloured patch.
Timber grain is not uniform. It has a direction and flow, varies in width and spacing, and contains knots, figure, and cathedrals (the arched grain patterns common in flat-sawn timber). Using fine-tip brushes and multi-tonal inks, we extend the grain lines from the boards on either side through the repair area, following the natural flow of the surrounding grain.
The goal is that the eye follows the grain lines continuously across the repaired section rather than stopping at a boundary. This requires studying the adjacent boards carefully before starting — grain lines that run at the wrong angle or with the wrong spacing are immediately obvious.
For species with strong figure — Spotted Gum, Jarrah, or Victorian Ash — this step takes significantly longer than for species with quiet, straight grain like Blackbutt or American Oak.
Step 5: Topcoat and Sheen Matching
Colour and grain accuracy are undermined if the sheen level of the repair does not match the surrounding floor. A matte floor with a satin-finish repair patch is visible from across the room, particularly in raking light from windows.
We apply a clear protective topcoat mixed to match the existing sheen level — flat matte, satin, semi-gloss, or high gloss. For floors with a textured surface (wire-brushed or hand-scraped finishes), we replicate the texture into the wet finish before it cures using micro-tools.
The stress test for a finished repair is to view it from a low angle against window light. This is where sheen mismatches and texture discrepancies become most visible. A well-executed repair should be difficult to locate from this angle.
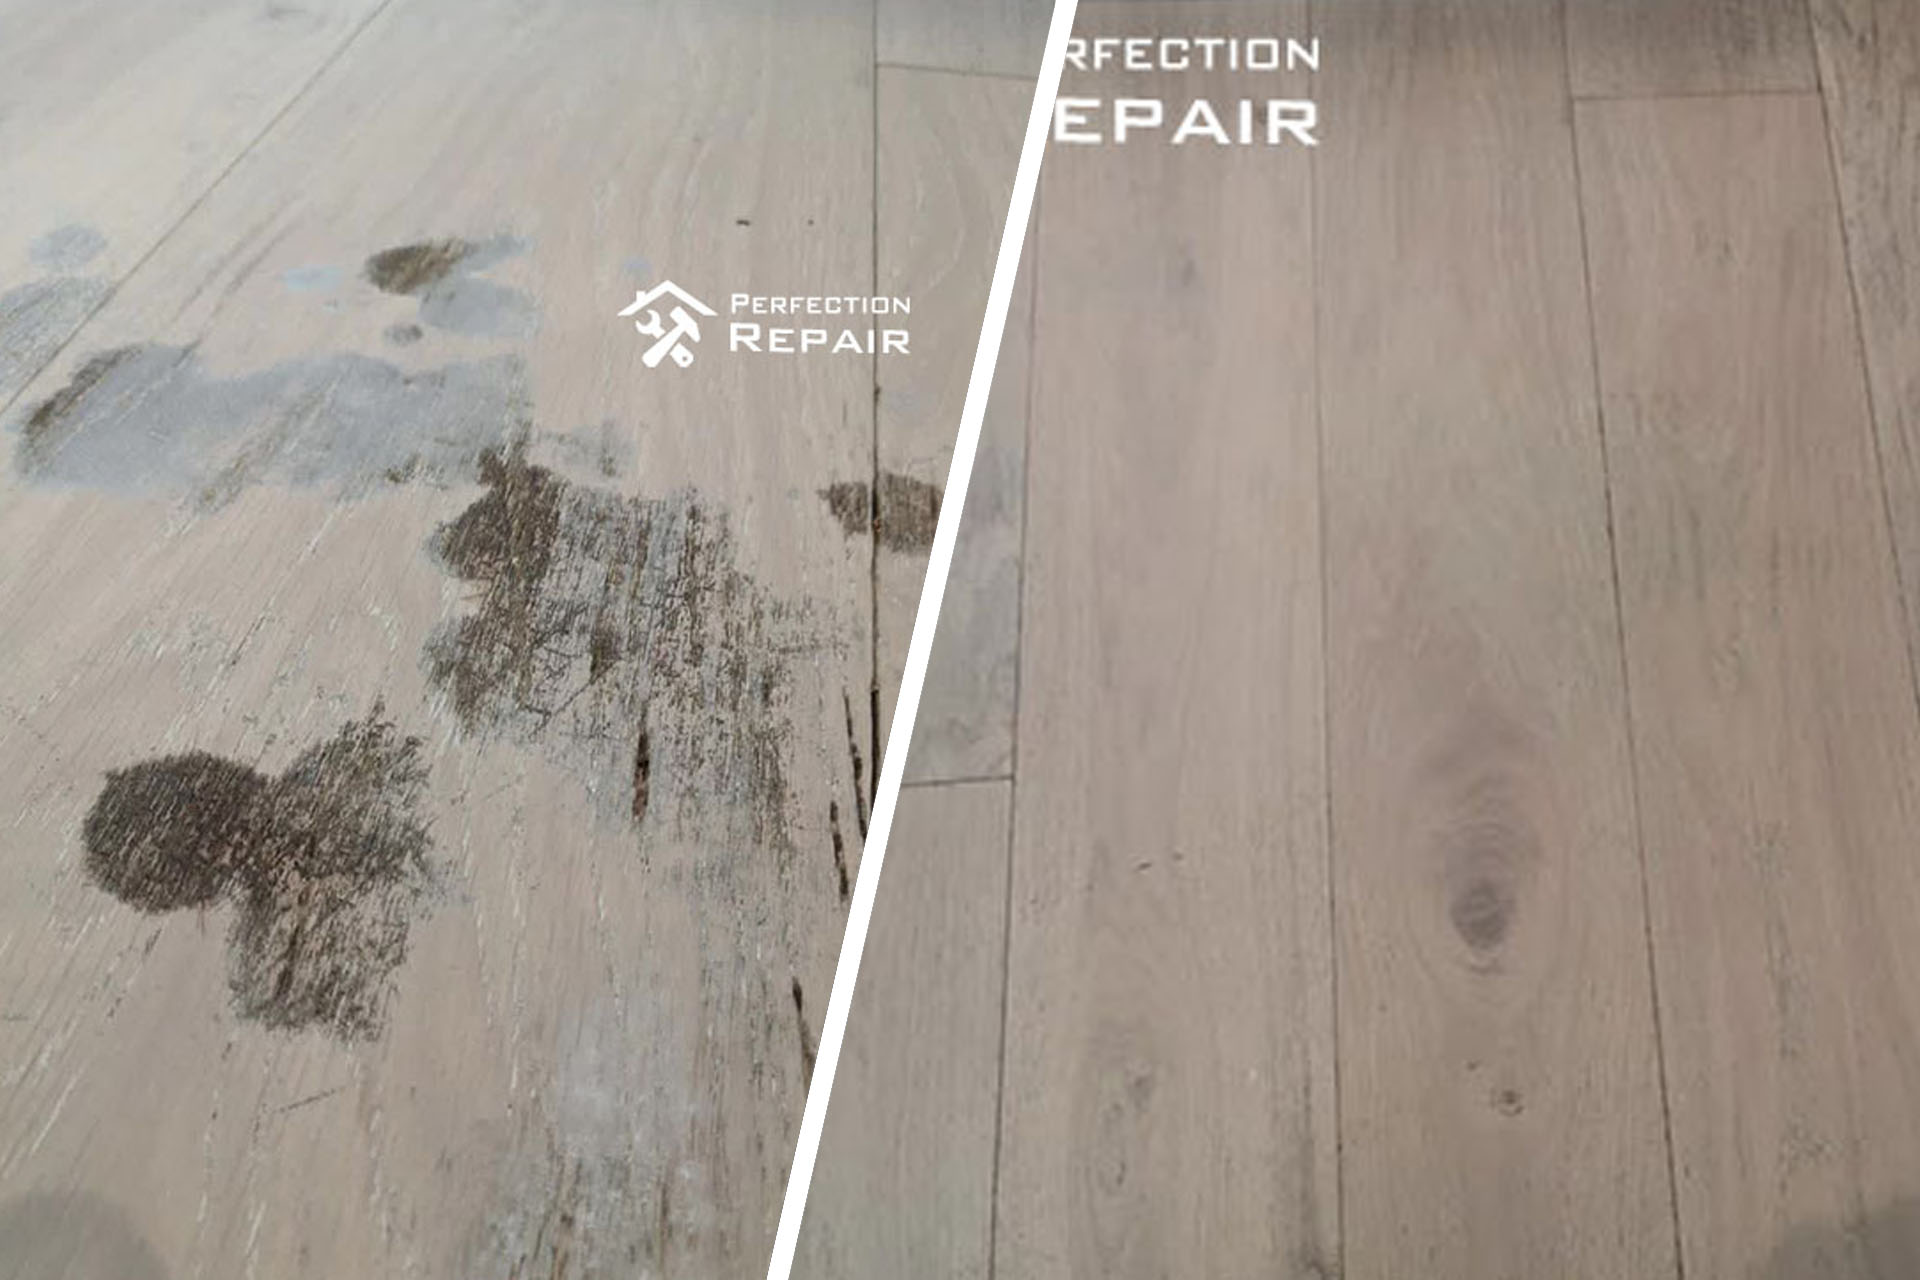
Real Project: Three Chemically Damaged Boards in Rhodes
A Rhodes apartment provides a useful example of why assessment comes before the repair method. A heavy-duty cleaning product had reacted with the lacquer across three boards in a high-traffic corridor. The surface looked cloudy and dull, but inspection found that the timber beneath remained intact and the damage stopped at the coating layer.
That finding ruled out the need for full-floor sanding or board replacement. The compromised lacquer was removed only from the affected boards, with the surrounding floor masked and retained. A custom coating was then blended to the existing semi-gloss level and applied in controlled stages, checking the surface under raking light after each pass.
The project record documents four hours on site, zero boards replaced and no visible repair line at completion. Those results apply to this project, not every scratched floor: chemical damage confined to a coating is different from a deep gouge, moisture-swollen board or moving substrate. Read the complete Rhodes timber floor restoration case study.

What Determines Whether a Repair Will Be Visible
Not all repairs achieve the same result. The factors that affect outcome:
Damage depth and size. Small, shallow scratches are easier to make invisible than large deep gouges. A scratch the width of a fingernail across a single board is a different challenge from a gouge the size of a fifty-cent piece that has removed timber to a significant depth.
Timber species and grain complexity. Quiet, straight-grained species like Blackbutt are easier to replicate than species with complex figure. A repair on quarter-sawn Oak with strong ray fleck is technically demanding.
Floor age and patina. A floor that has developed decades of UV patina and accumulated surface character is harder to match than a recently installed floor. The overall colour of an aged floor is complex and varies across the room.
Existing finish condition. A repair on a floor with a consistent, well-maintained finish blends more easily than one on a floor where the surrounding finish has worn unevenly or been spot-treated inconsistently over the years.
We assess all of these factors before starting and give clients a realistic expectation of the outcome. A repair on a complex floor in difficult conditions will be less invisible than one on a simple, well-maintained floor — and we say that upfront rather than after the job is done.
For more detail on our timber floor repair services in Sydney, see our timber and hardwood floor repair page. If you have a floor that needs assessment, contact us for an on-site quote.